Sending Media Replies with AutoResponder and Tasker
- Tim Kosmala
- Feb 22, 2022
- 2 min read
Updated: Mar 17
Currently, it is not yet possible to send media replies directly through AutoResponder, as this would only be possible with restrictions. If you still want to send pictures or other files automatically, you can just send a link to the file or try to do it using Tasker.
Please note that automatic media replies cannot be sent in the background and when the screen is locked. You may need to turn off your lock screen. Tasker can only simulate user input, which will temporarily interrupt your use of the device. Also note that this guide is primarily for WhatsApp and you will need to customise the task according to your needs.
If you want to only reply to received media messages, please check here.

How to send media replies automatically?
1. Get AutoResponder and Tasker.
2. Grant contact and storage permissions for Tasker.
3. Download the TouchTask plugin. (Seems like it's not available anymore. Maybe try AutoInput or MacroDroid instead)
4. Open TouchTask and grant necessary permissions.
5. Import the Automatic Media Messages task from TaskerNet.
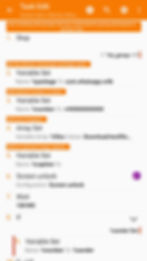
6. Within this task you need to configure a few things (The package and contact name will be replaced automatically if this task gets triggered by an AutoResponder event):
- Default messenger package name: com.whatsapp (WhatsApp) or com.whatsapp.w4b (WhatsApp Business) (You can also enter other messengers, but then you need to adapt most other actions in this task too)
- Default number or name: Set a default phone number to send the media to. You can also input a name, then it will be converted to a number using your address book.
- Images: Here you need to set the file path(s) of the image(s) you want to send, separated by commas. If you want to send other files, you may need to change the TouchTask tap action which you find as one of the last actions in this task. This is because WhatsApp shows a different confirmation dialog in those cases.
- Optional caption: This adds a caption to your images.
7. Go back to save your changes.
8. Now you can link the task to an AutoResponder event profile to trigger it automatically when a message is received. Therefore head to the Profiles tab and click + and create. You can then find AutoResponder under Event > Plugin. Click configure and choose a rule or all messages. If you have no rules yet, you may first add one within the AutoResponder app.

9. After configuring AutoResponder as an event, you will be asked to connect a task. Select the Automatic Media Messages task you have imported before.
10. Try to see if everything works as expected. If Tasker seems to stop at a specific step, check whether you need to increase the time of the Wait task. Perhaps the UI did not completely load in time.
11. That's it! Tasker will now automatically reply with the images you have set!